Monday, October 2, 2017

Wait....is my underdress wrong?

Imagine my surprise when I realized that my trove of SCA appropriate over and under dresses didn't really match up with the evidence I have been amassing on my personas possible clothing choices.

As I have deepend my research into 10th century Norse female graves both in Scandinavia and Western Russian I have found more and more evidence that our "t - tunic" inspired wardrobes are...well wrong. There I said it now don't be mad just hear me out! The extant textile evidence tells us that maybe we are doing it wrong.
 (Here is a link to my recent A&S Documentation for this very subject)

(my husband is gonna love that he is on my blog! No.... he is not so lets just not tell him okay 😖😉)

So my dear friends you might ask "Rannvaeig what is wrong with this picture?" Well let me tell you friend. Do you see my fantastic big scooped out neckline? Do you see all that fantastic, and tiny I might add, hand stitching that I used? Oh yeah I love that under dress and I am here to tell you friends that other than the fact that is was naturally dyed and made out of linen it is probably wrong. Very likely wrong and here is my evidence as to why.


In one the most respected articles on "Viking" or Norse under dresses also known as "serk" the author Hilde Thunem extensively researched and studied the evidence of under dresses from Norse graves (in this article) in both Scandinavia and Western Russia. In looking through this research again I have reformulated a thought long banished to the back of my mind because....God forbid it would mean I was going to have to remake my garb....seriously for the love of all things wholly!

Specifically quoting from her article "The practice of pleated linen seems to become more common in the 10th century, and only three of the 21 instances of pleated linen are found in 9th century graves."
caught my attention because well...I have a tenth century persona and I have gone to all the trouble to point out my ridiculously thin time period so yeah...my under dresses are not pleated (and neither is anyone of the other under dresses in the SCA who are portraying late "Viking" era personas.)

So lets talk about this "pleated under dress" business. How do we know that the under dresses are pleated? Glad you asked. The above quote was specifically referring to grave found in Birka, Sweden and below I will show evidence of similar under dresses in Pskov, Russia that are attributed to Norse graves. For reference here is a map to show where Birka and Pskov are:

What is also interesting is that we have a partially intact neckline from a grave in Pskov from the same time period. This neckline that was found in Pskov was found in a birch box wrapped up around a pair of tortoise shell brooches which has identified it as a Scandinavian grave. (There is the link to the extant grave evidence)
Here is a photo of the neckline. Grave 3 Pskov, Russia.

So with the evidence found both in Birka and in Pskov I wondered why we don't have gathered necklines that tie at the throat in the SCA? My conclusion......it is just "easier" to have a keyhole or round neckline because.....well everyone does it. That though does not make it period correct. I too made all of my under dresses with round necklines as a beginner because ....well I didn't know any better.
Here are some photos of my now corrected necklines. Maybe take a look at the evidence and see if you want...or need to change the neckline on your under dresses as well :) Then please post pictures so I can see them.

Thursday, September 28, 2017

Walk like a....Medieval Person?

I found this interesting blog and attached video that really made me think about how I walk in my period Norse boots.

Take a look and and see if your a ball walker at events and a heel walker at home!
http://gurneyjourney.blogspot.com/2017/09/did-medieval-people-walk-way-we-do.html?m=1


Sunday, September 10, 2017

Birch Bark Boxes for all your storage needs!

So life has kept me very busy this year but alas I am back.

I wanted to share with you readers a few of my projects that have kept me busy this 2017. I will be adding projects for the next several weeks once every 7-10 days.
This post is centered on the birch bark box recreation I attempted over the summer. The Varangian attributed graves that I study with women in them have an interesting similarity, there seems to be a recurring theme of a large birch box container with clothing and jewelry wrapped up in side some where with in the grave. I decided I should attempt to make this box. Here is my project.


Possible 10th Century Birch Bark Box Construction


Birch bark boxes, baskets and other containers have a very long history both in the Baltic world and continue to do so in modern folk culture. Pieces of both bark and the heartwood have been found throughout central and western Russia in the centuries preceding the 10th that show these materials were used for everything from letters of correspondence to a doodle pad. Specifically in Novgorod hundreds of birch bark letters have been found preserved in the wet clay soils and they show a vibrant history of using and preparing birch bark for use in correspondences. (Iivius)  Birch trees were an abundant source of useful material in western Russia and continue to be utilized into the modern day
14th century birch bow lid.jpg Onfim-birch-bark-199.jpg
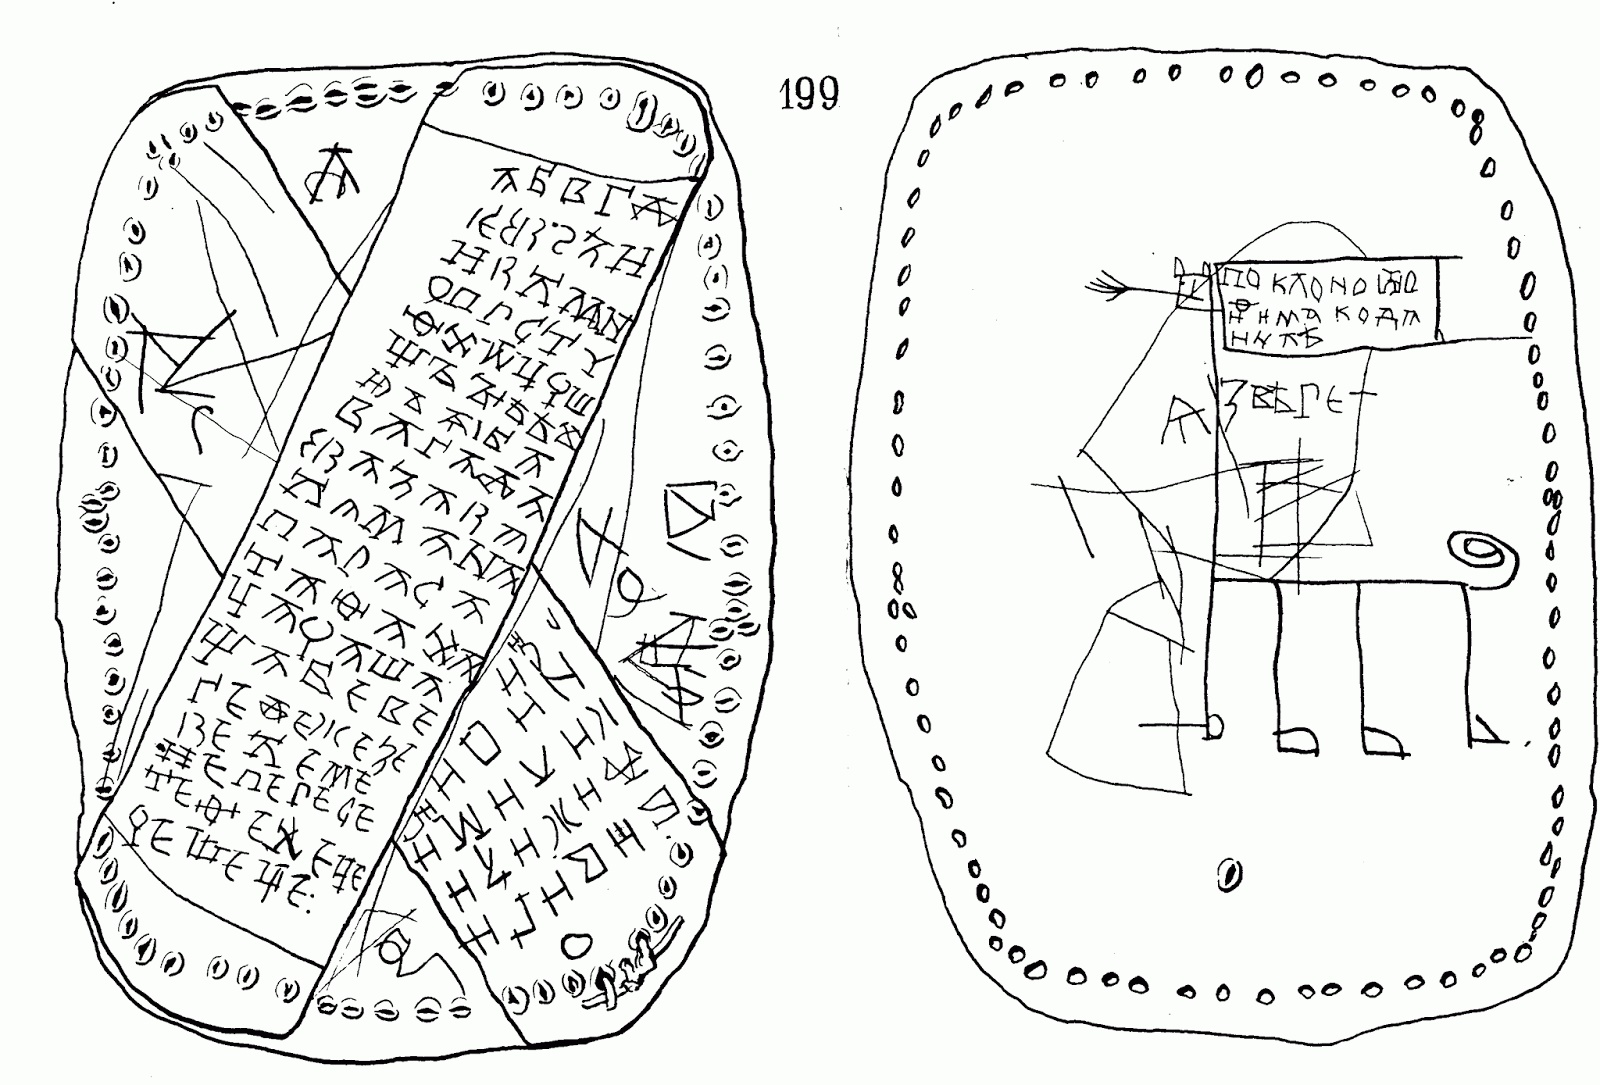
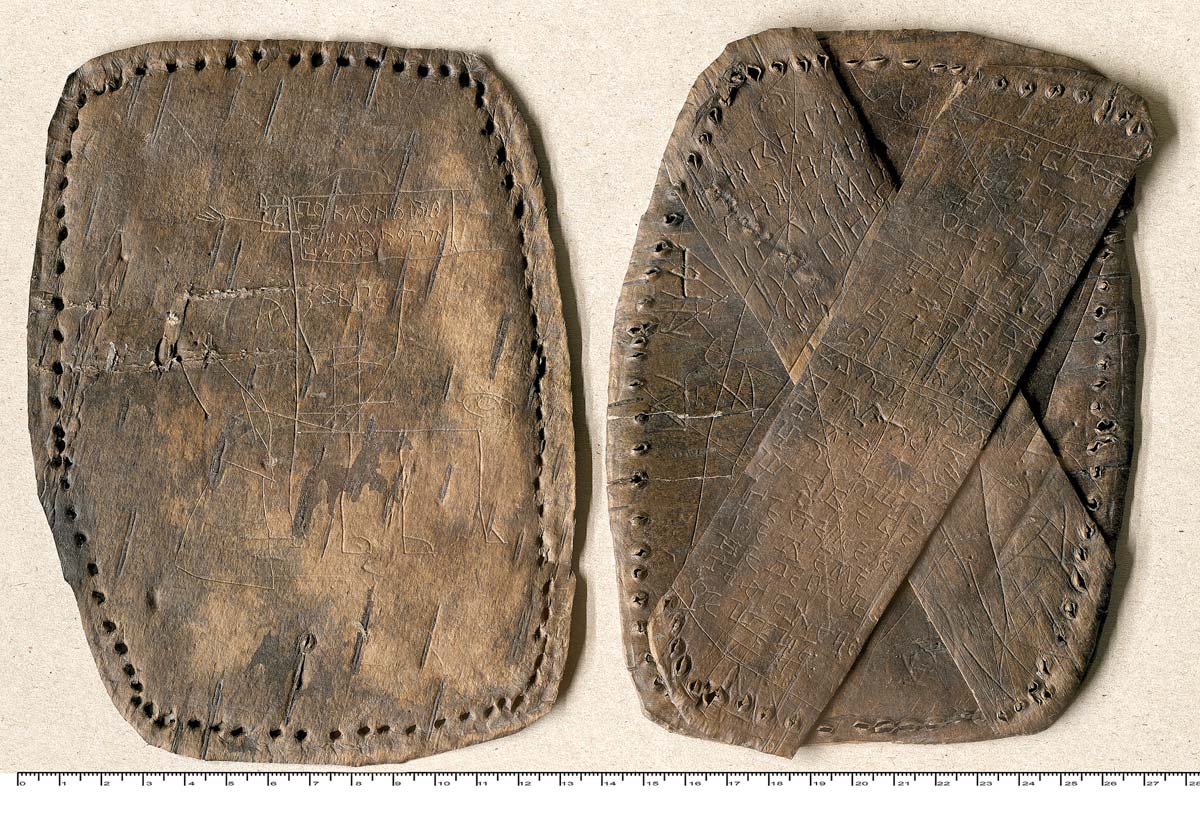
13th Century Birch Box Lid with Child’s homework written on it. Found in Moscow 2015
moscow birch bark letter 2.jpg
Moscow 4 Birch Bark letter from a 2015 dig near Red Square is very similar to letters found in Novgorod. 13th century


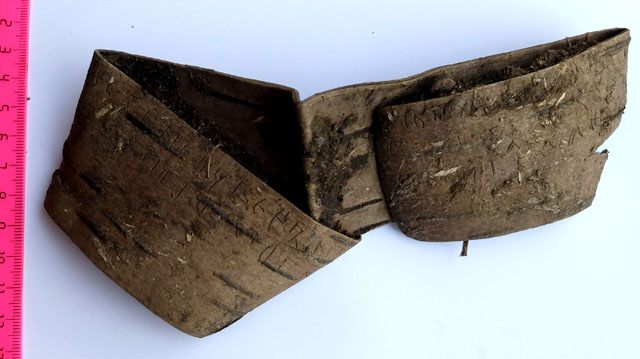
In the Pskov and Gniozdovo 10th century graves have yelled the remains of  birch bark discs in the female graves. These discs appear to have been the tops and bottoms of containers. We know that the modern craft of birch bark box crafting is alive and well throughout Russia and the Baltic and is thought to be a centuries old technique.
birch_open modern.jpg modern birch bark boxes.jpg
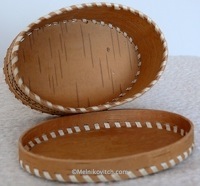
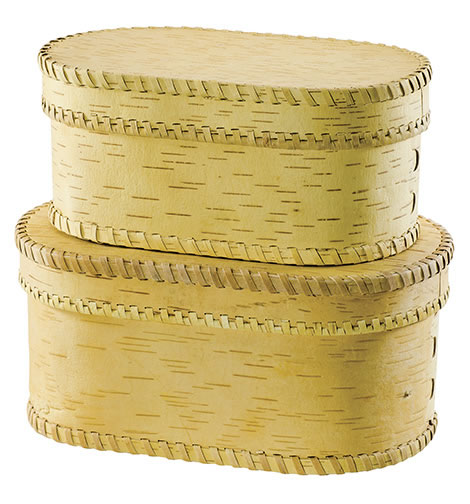
Modern birch bark boxes found in a google image search and available for sale


The extant examples found in Pskov and Gniozdovo were of birch bark disks with clothing and jewelry remaining sandwiched in between. In both Pskov and Gniozdovo it appears that clothing and jewelry have been stored in these birch containers in the female graves and were both found stored on the floor of the the graves.(Zubkova 291 Avdusin 22). In the Pskov grave the birch bark disks were referenced as follows “ textiles were placed in a birch bark container with a possible leather cover…” as well as “ remains of the base of a birch bark container reinforced wood” (Zukova 291-292) In the Gniozdovo grave complex the birch bark containers were referenced like this. “The remains of the birch bark boxes consisted of two disks 27cm  (11 inches) in diameter. Along the rim were small holes. This shows that the walls of the box- possibly of cloth - were sewn to it.” (forvännen 83 pg 28)
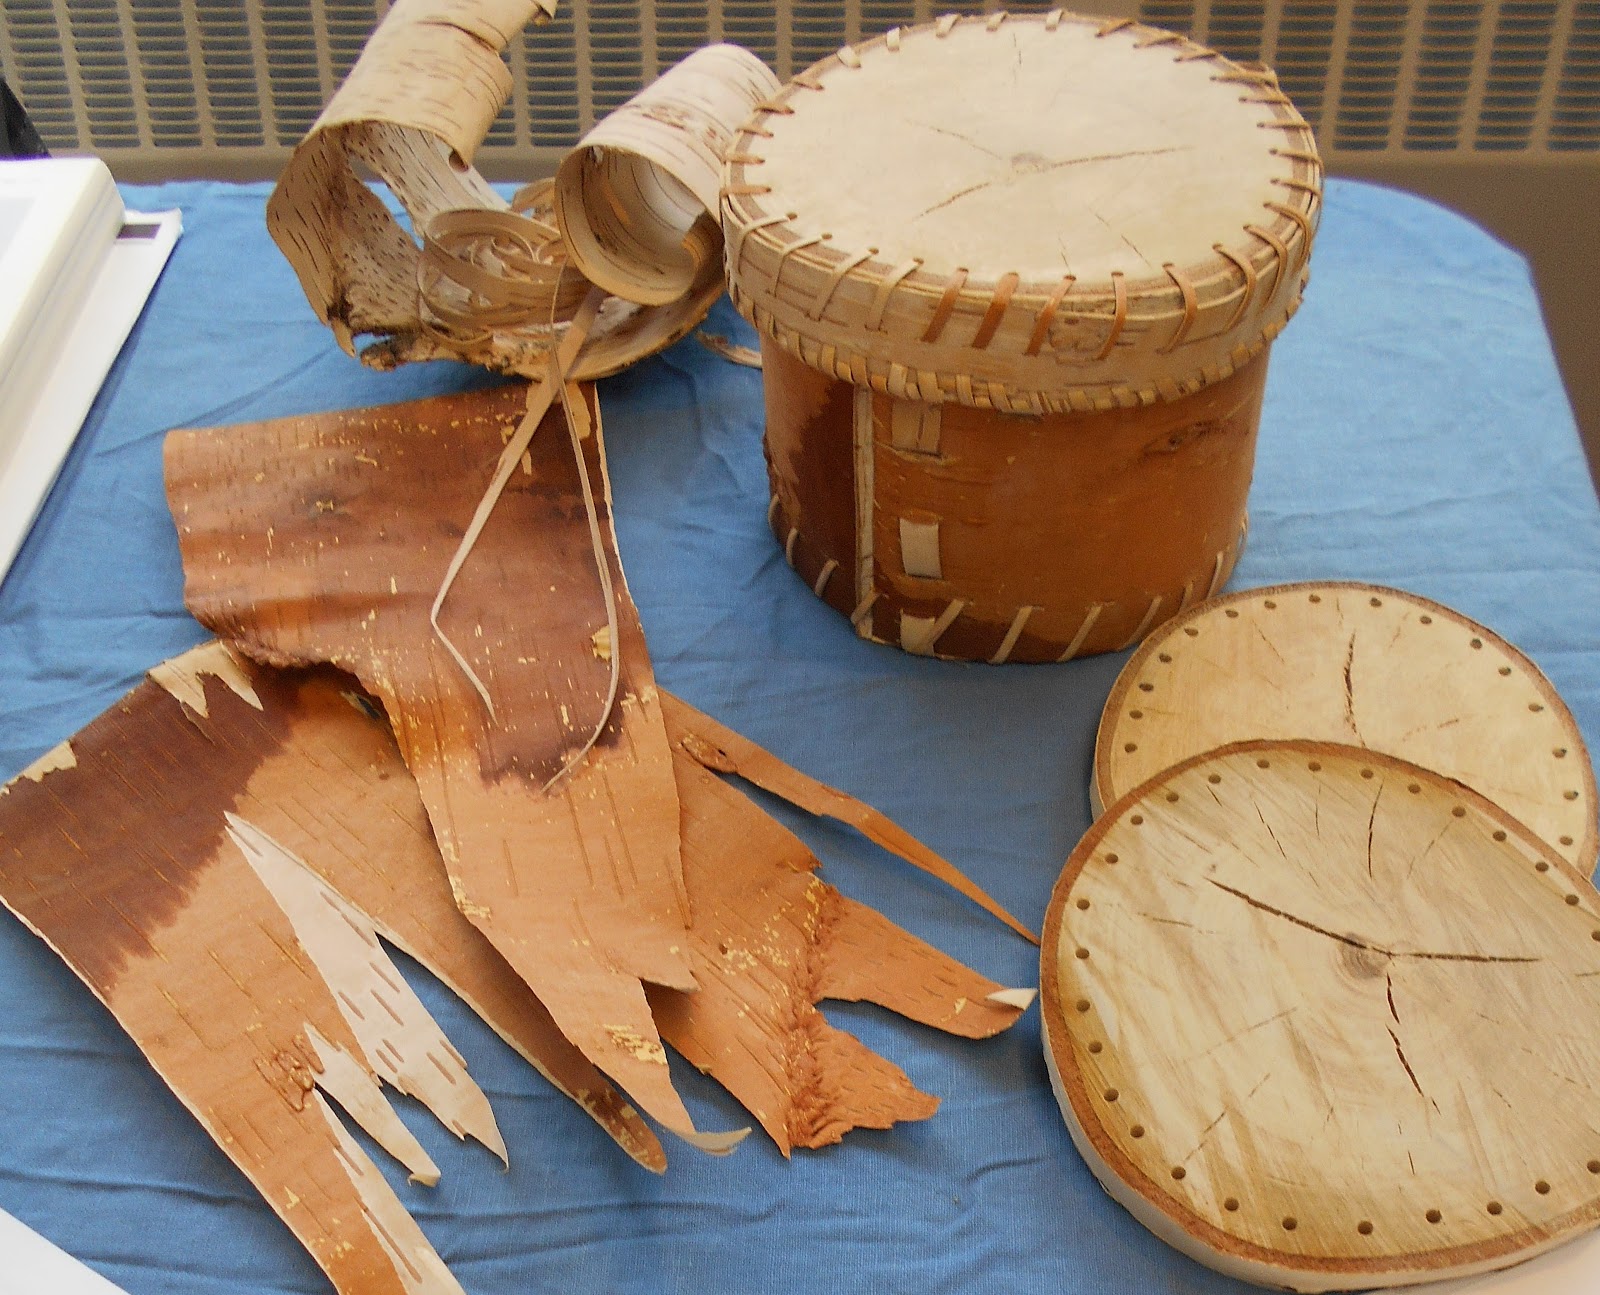
Due to birch bark and other wood products decaying quickly, very little remains of the extant birch bark containers other than the thicker top and bottom disks. I decided to make a 50% scale model of the Gniozdovo container as it is the only extant piece I was able to find measurements for. I created a design that would accommodate a large garment and the jewelry that would accompany it. I also chose to construct the box using the theory that the sides of the containers were constructed with wood and not cloth as there is no evidence of trace fiber left in either grave. For my entry I choose to use nothing but birch bark and birch wood products in the construction of the box.
GNEZDOVO GRAVE 301 BIRCH BOX LID AND CANDLES Found on pintrest.jpg
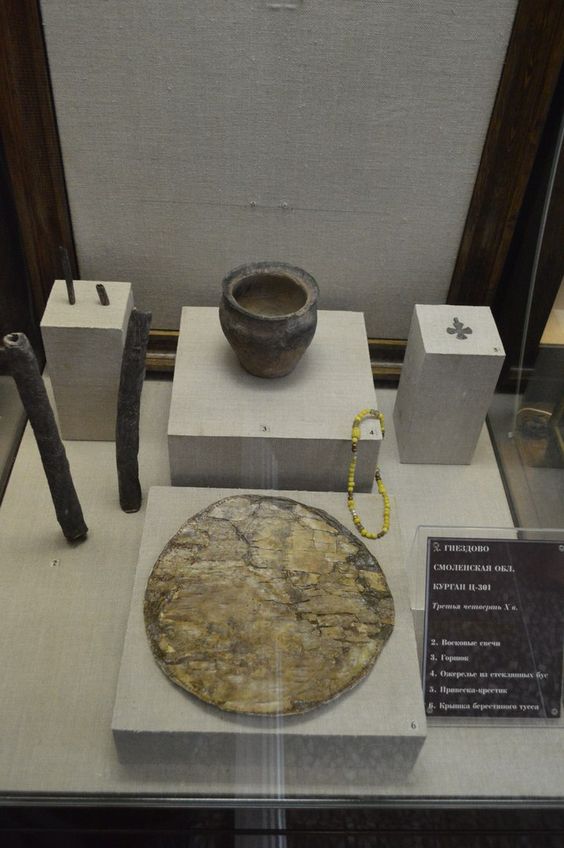
Photo of the birch bark disk on display from Gniozdovo Grave 301 at the State Russian Museum


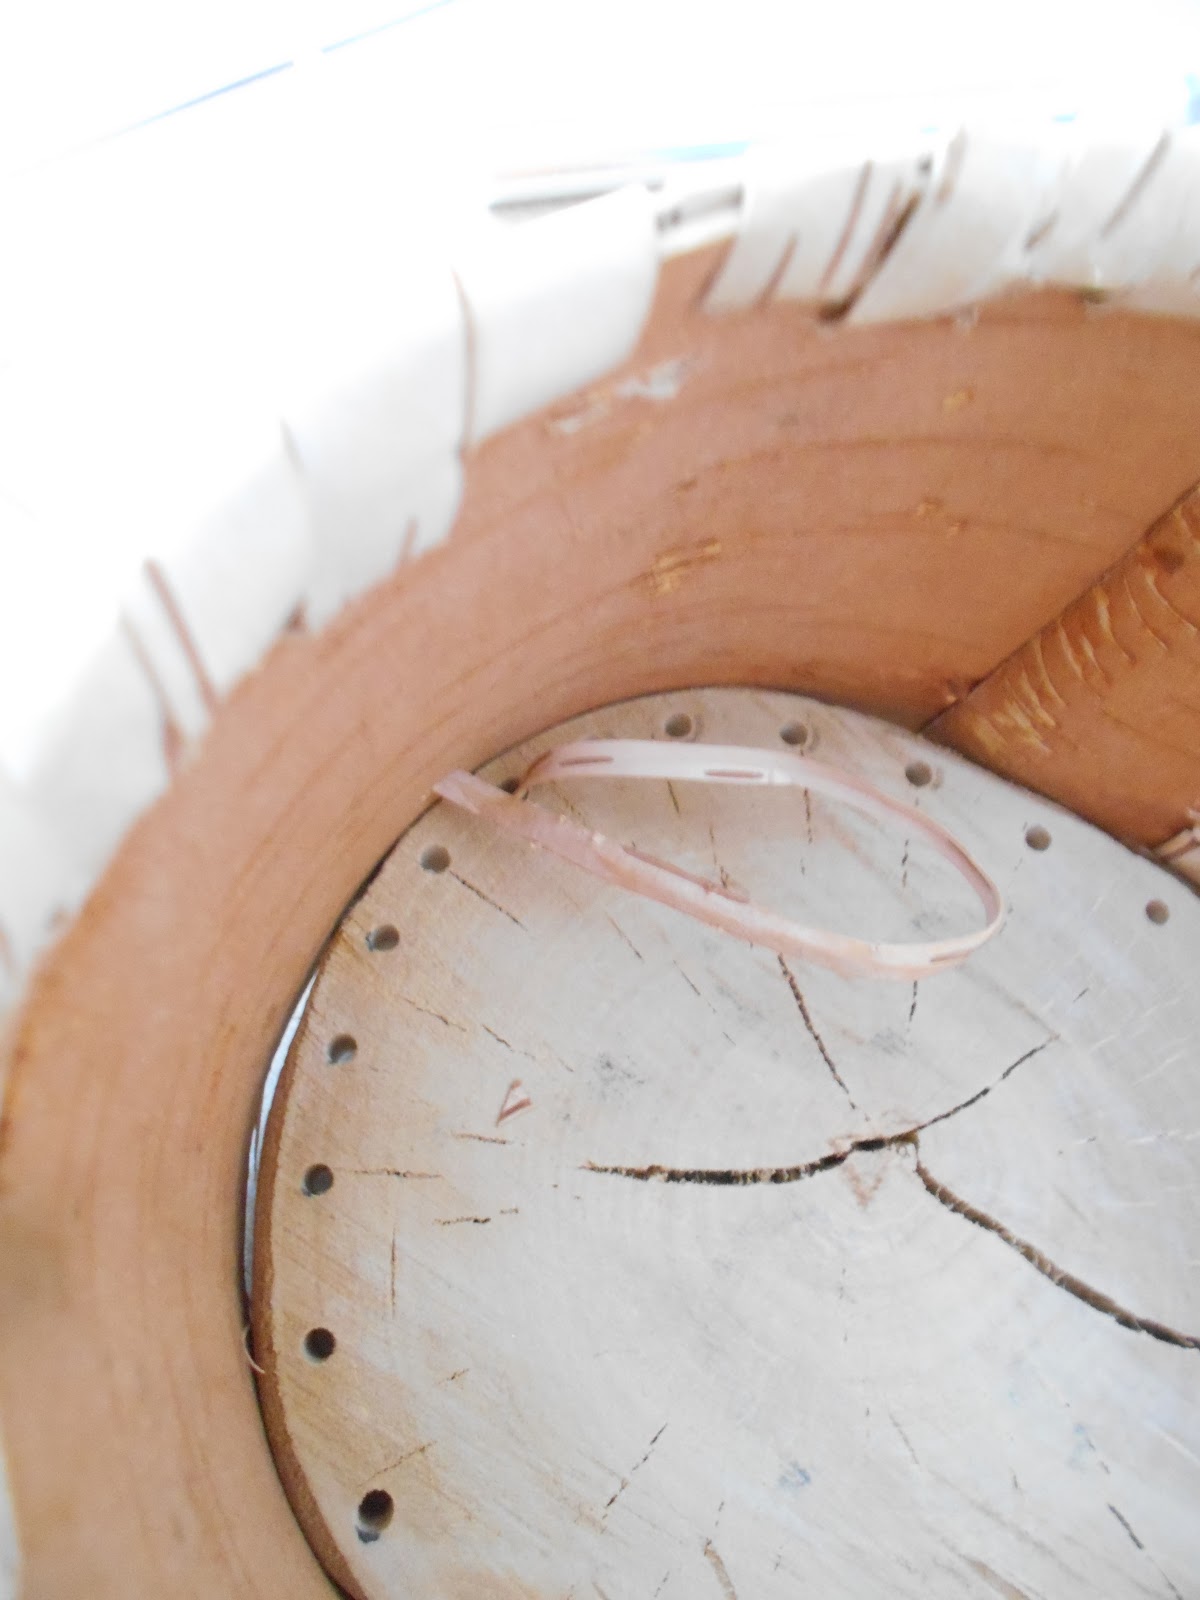
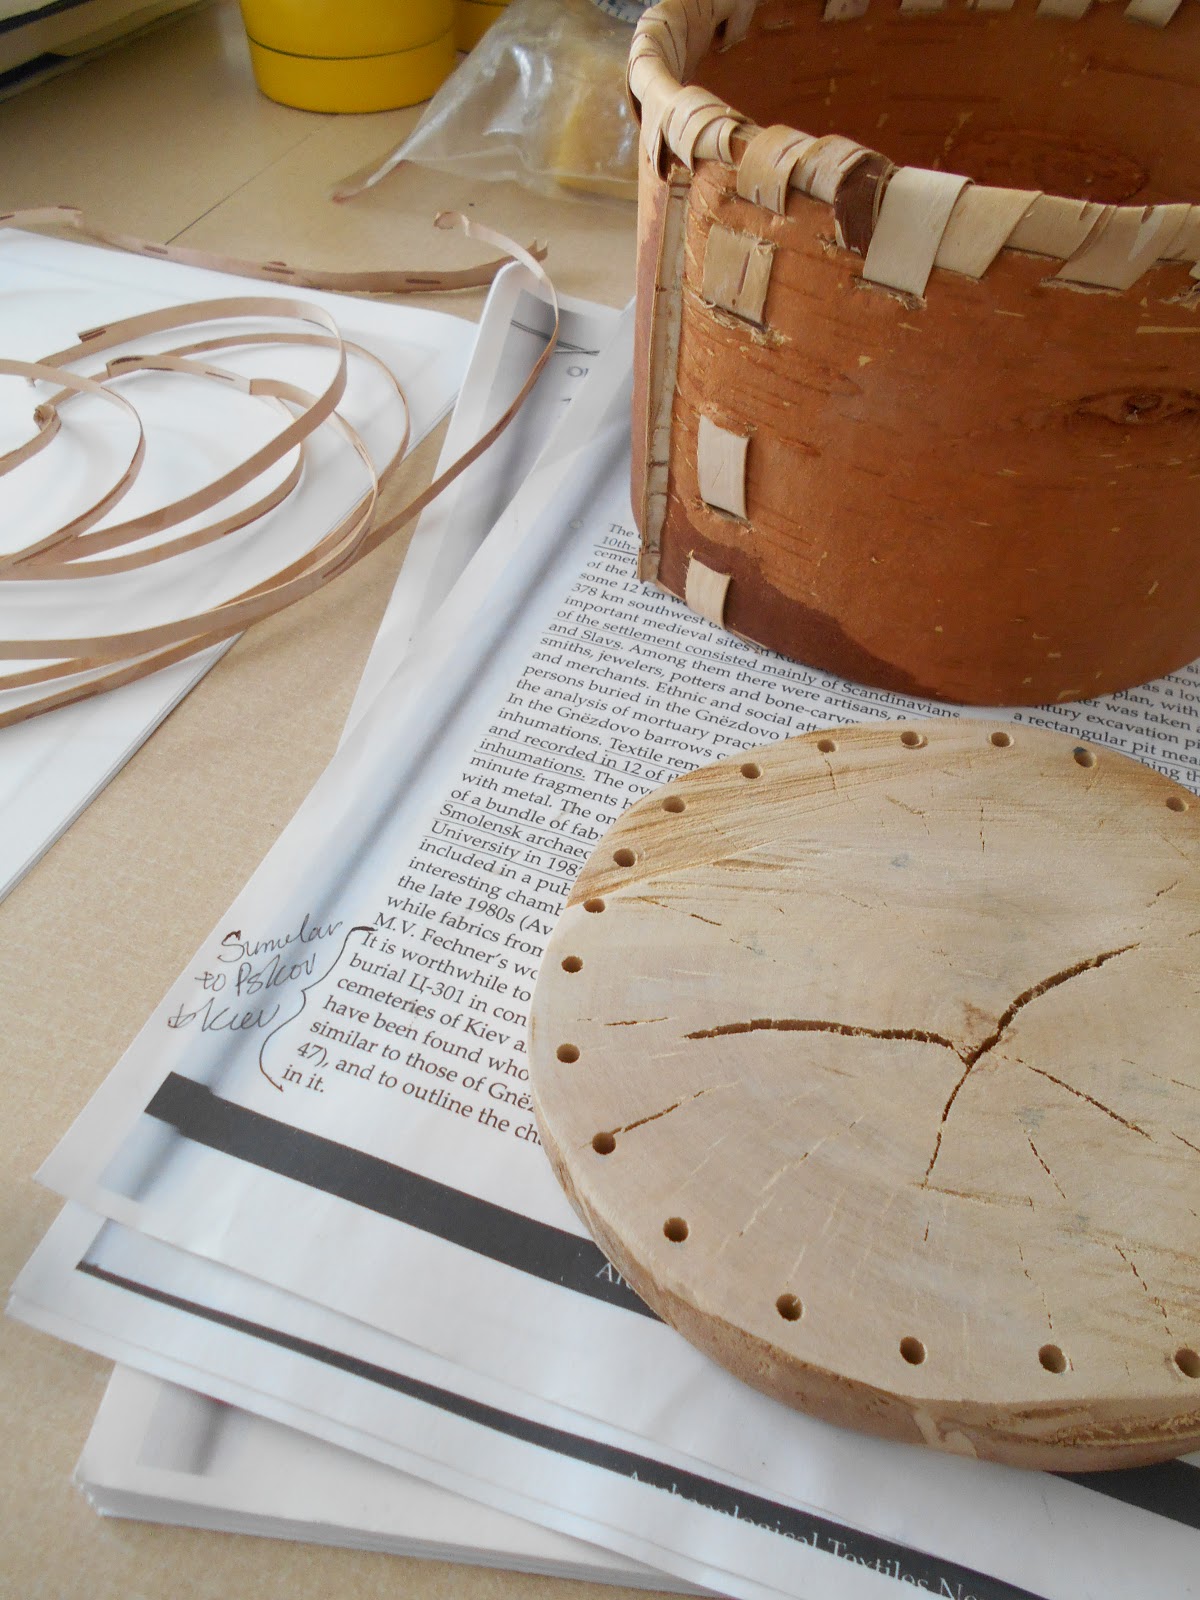
I took the information that I had regarding the birch bark disks and created a box design that I think would be able to hold up a large heavy garment and the additional weight of jewelry. In constructing my box I started with 2 similarly sized disks cut from the available birch tree I had procured. I cut the disks using a hand saw and  I then proceeded to sand the top and bottom of each disk smooth over a stone with sand on it to mimic modern day sandpaper. I drilled small holes along the outside edge for sewing the birch bark to the disks. In period a small hand drill and or an awl would have been used. I used a small dremel tool to save time and energy on the project as I do not have a hand powered drill.
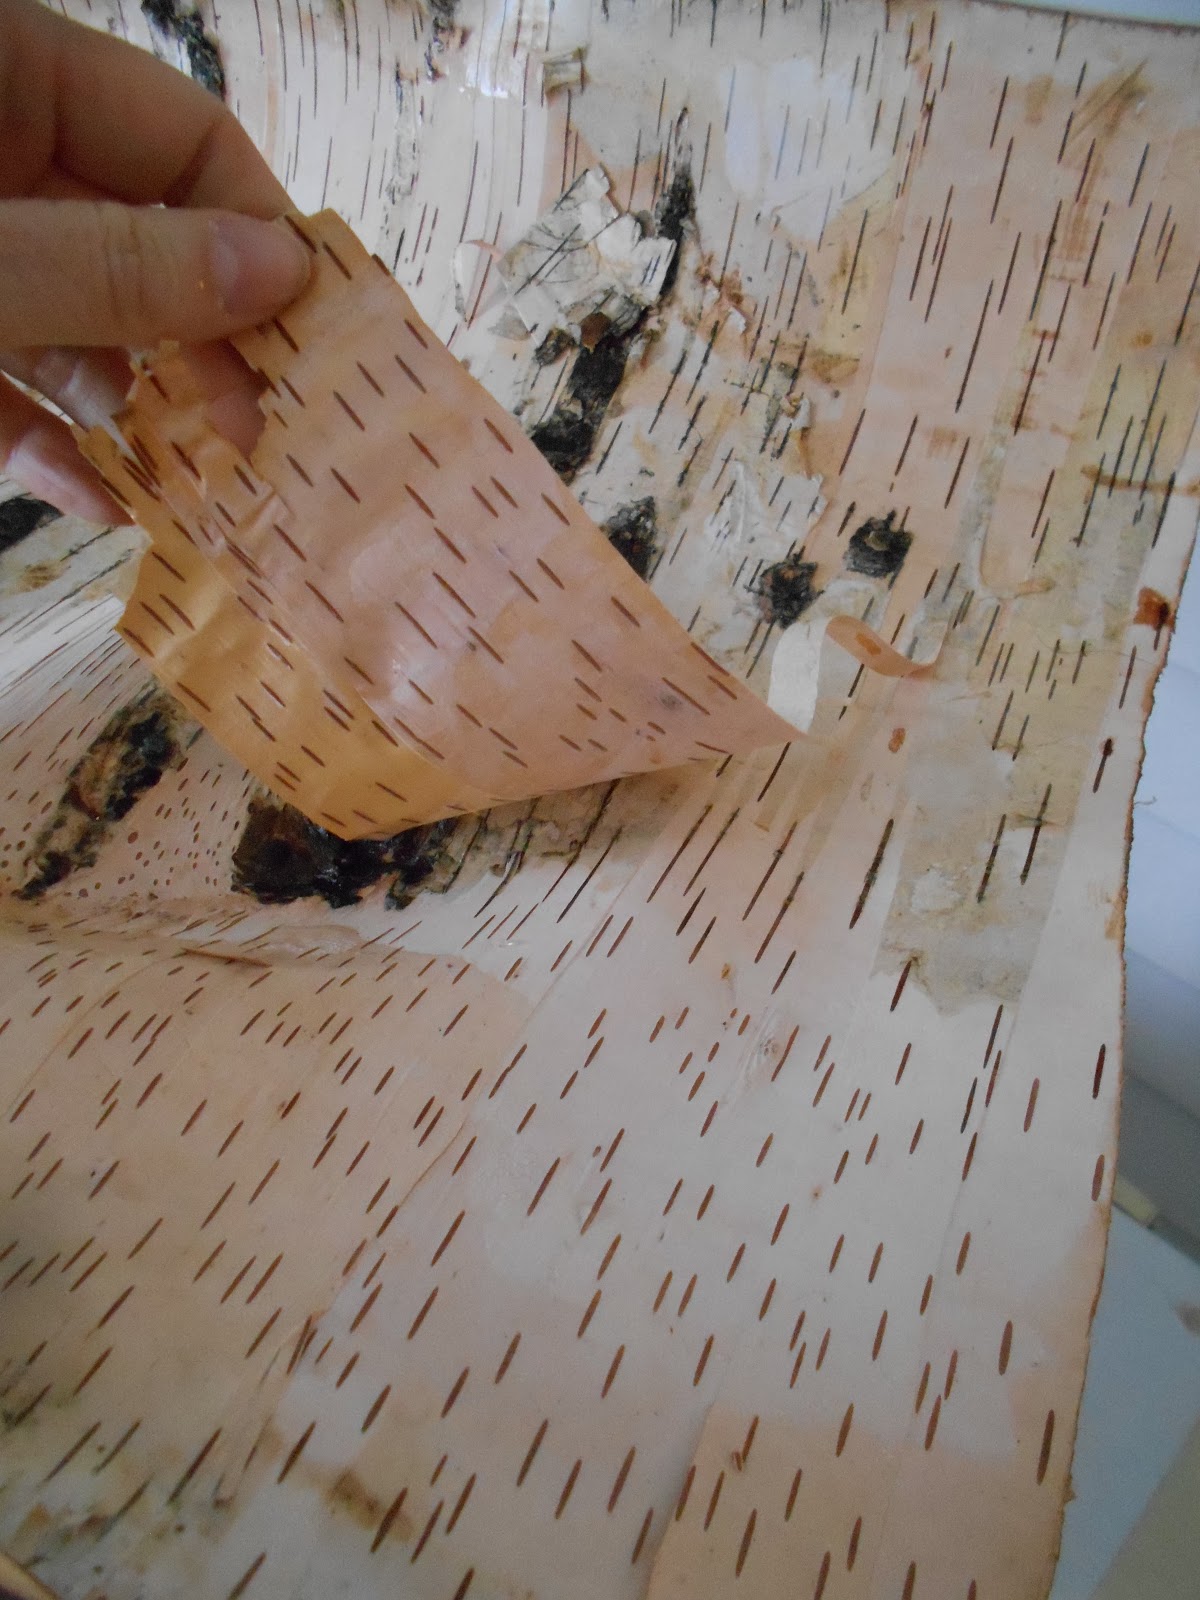
I decided to create a traditional box and lid shape for my scale model. I started by removing 2 large pieces of bark from a birch tree to use as my sides. I proceeded to then soak these bark pieces in water to help split the bark in half thus creating more material with which to work and giving me the desired inside wood to work with. I learned in my project this is a natural progression in using birch bark as the bark naturally splits into a thin papery layer and a sturdier layer and each can be used easily for different purposes.  
DSCN1423.JPG
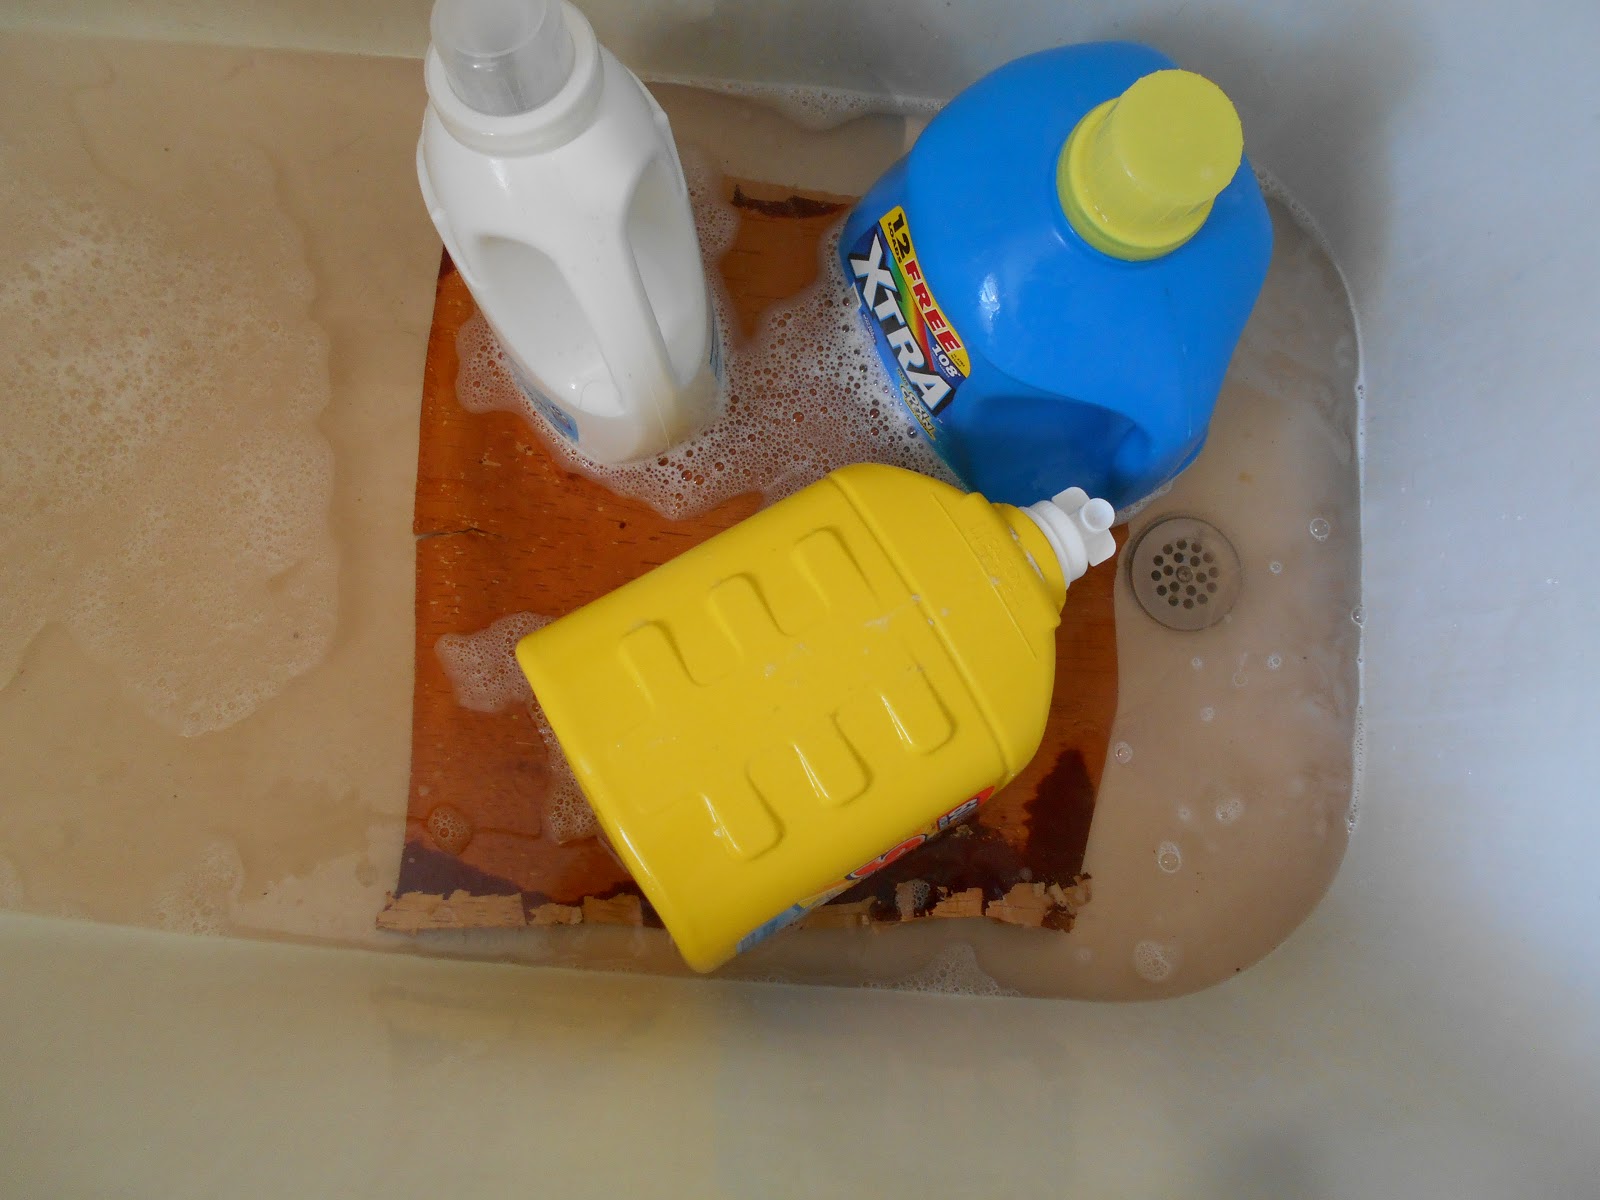
Birch bark soaking in the water. In period the bark could easily have been weighed down with stones and not laundry bottles from the recycling.
DSCN1424.JPG DSCN1427.JPG


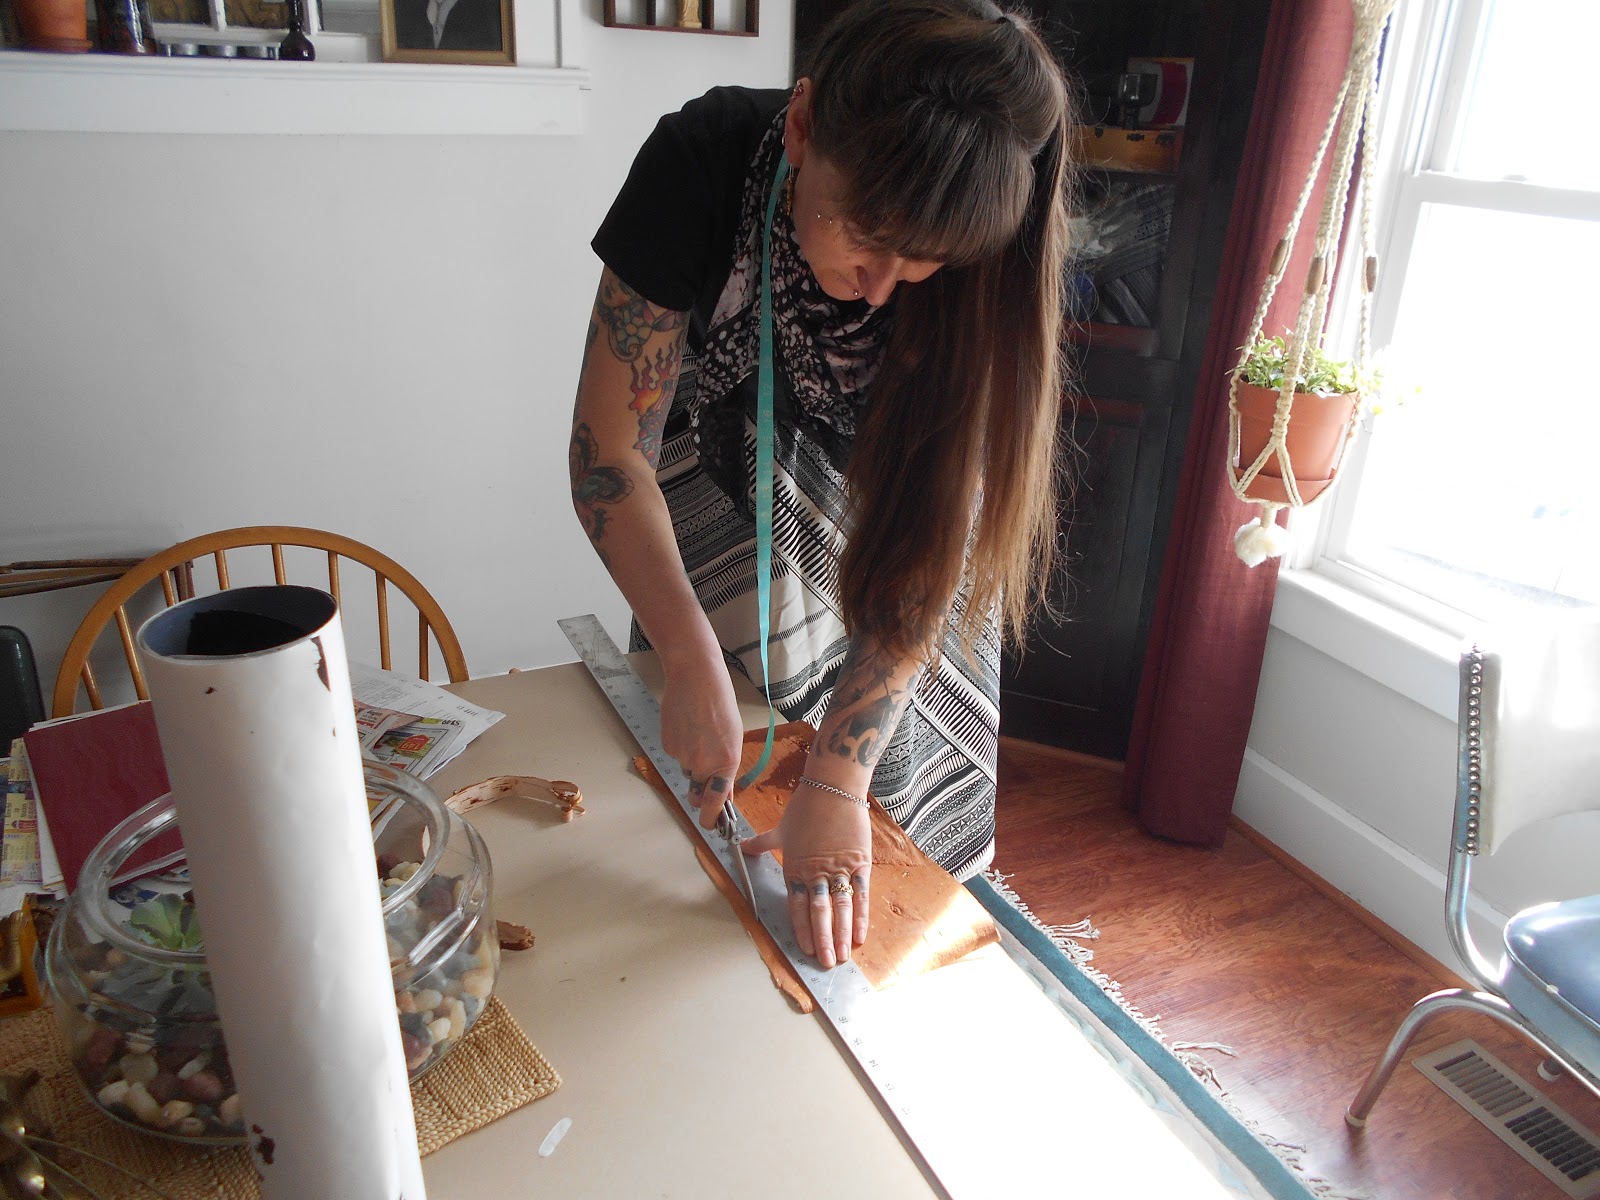
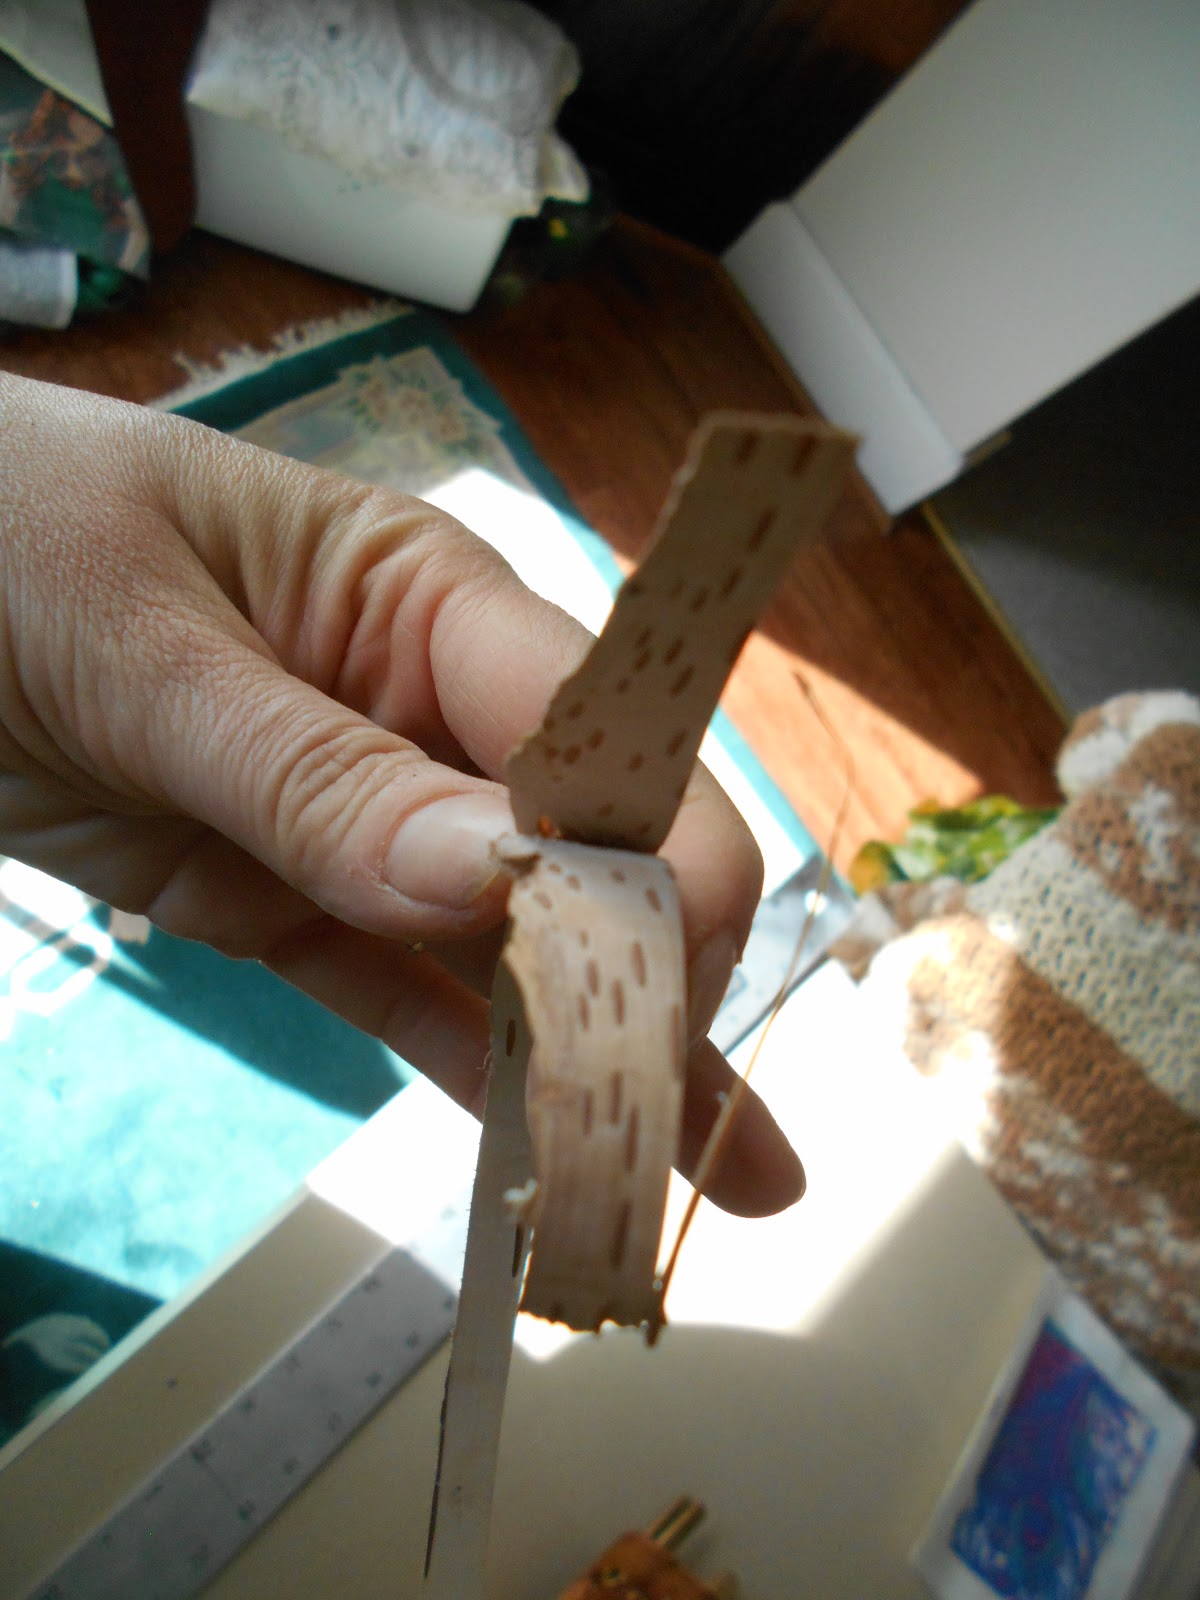
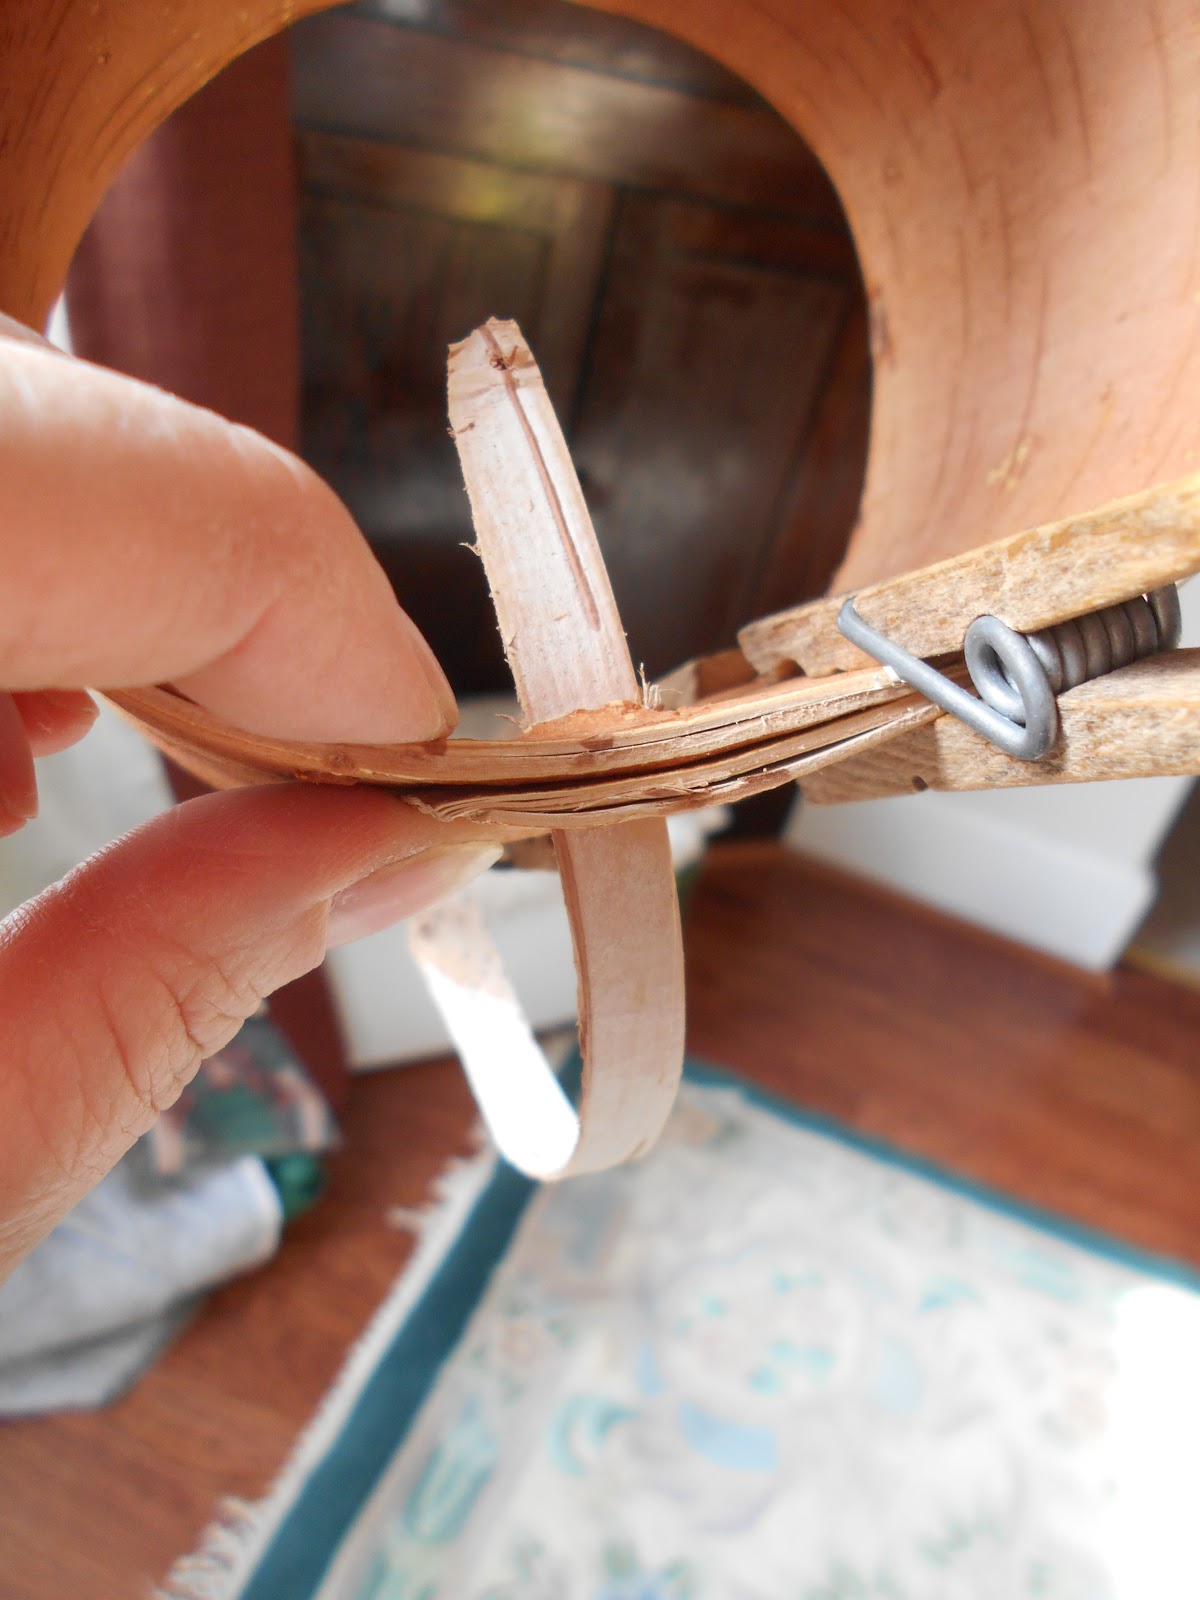
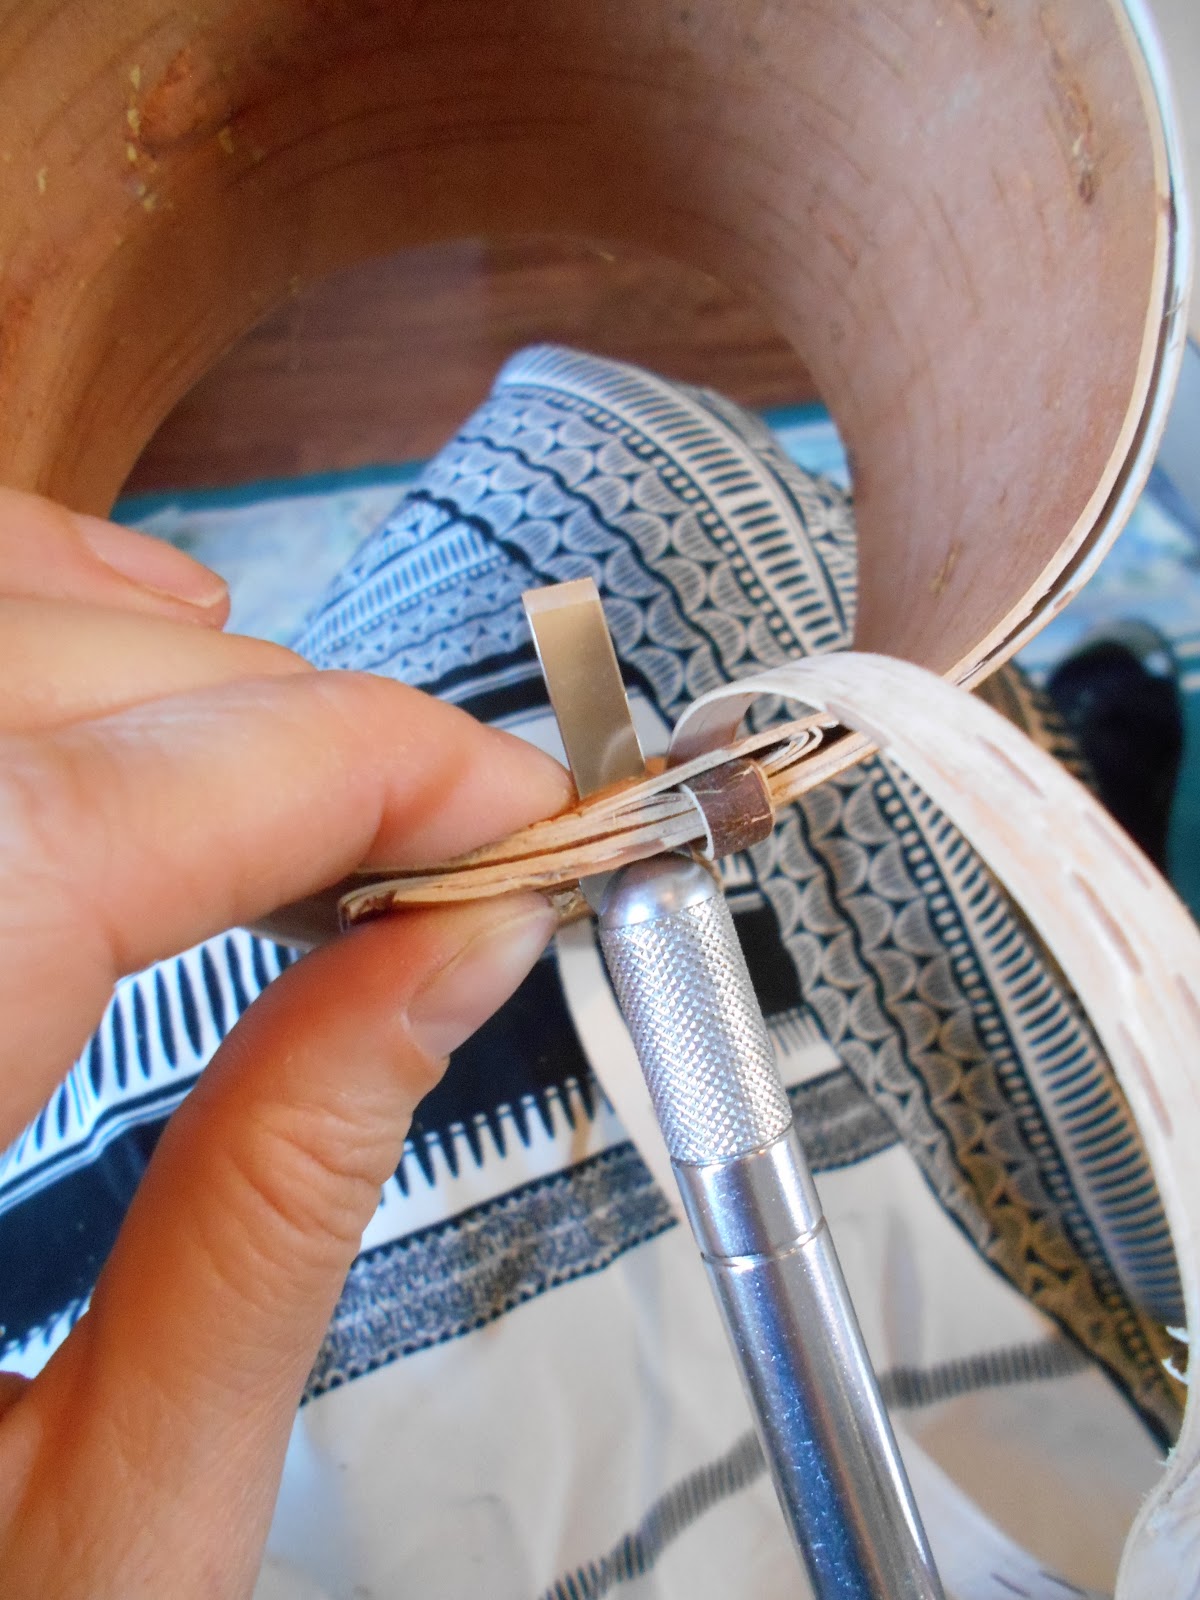
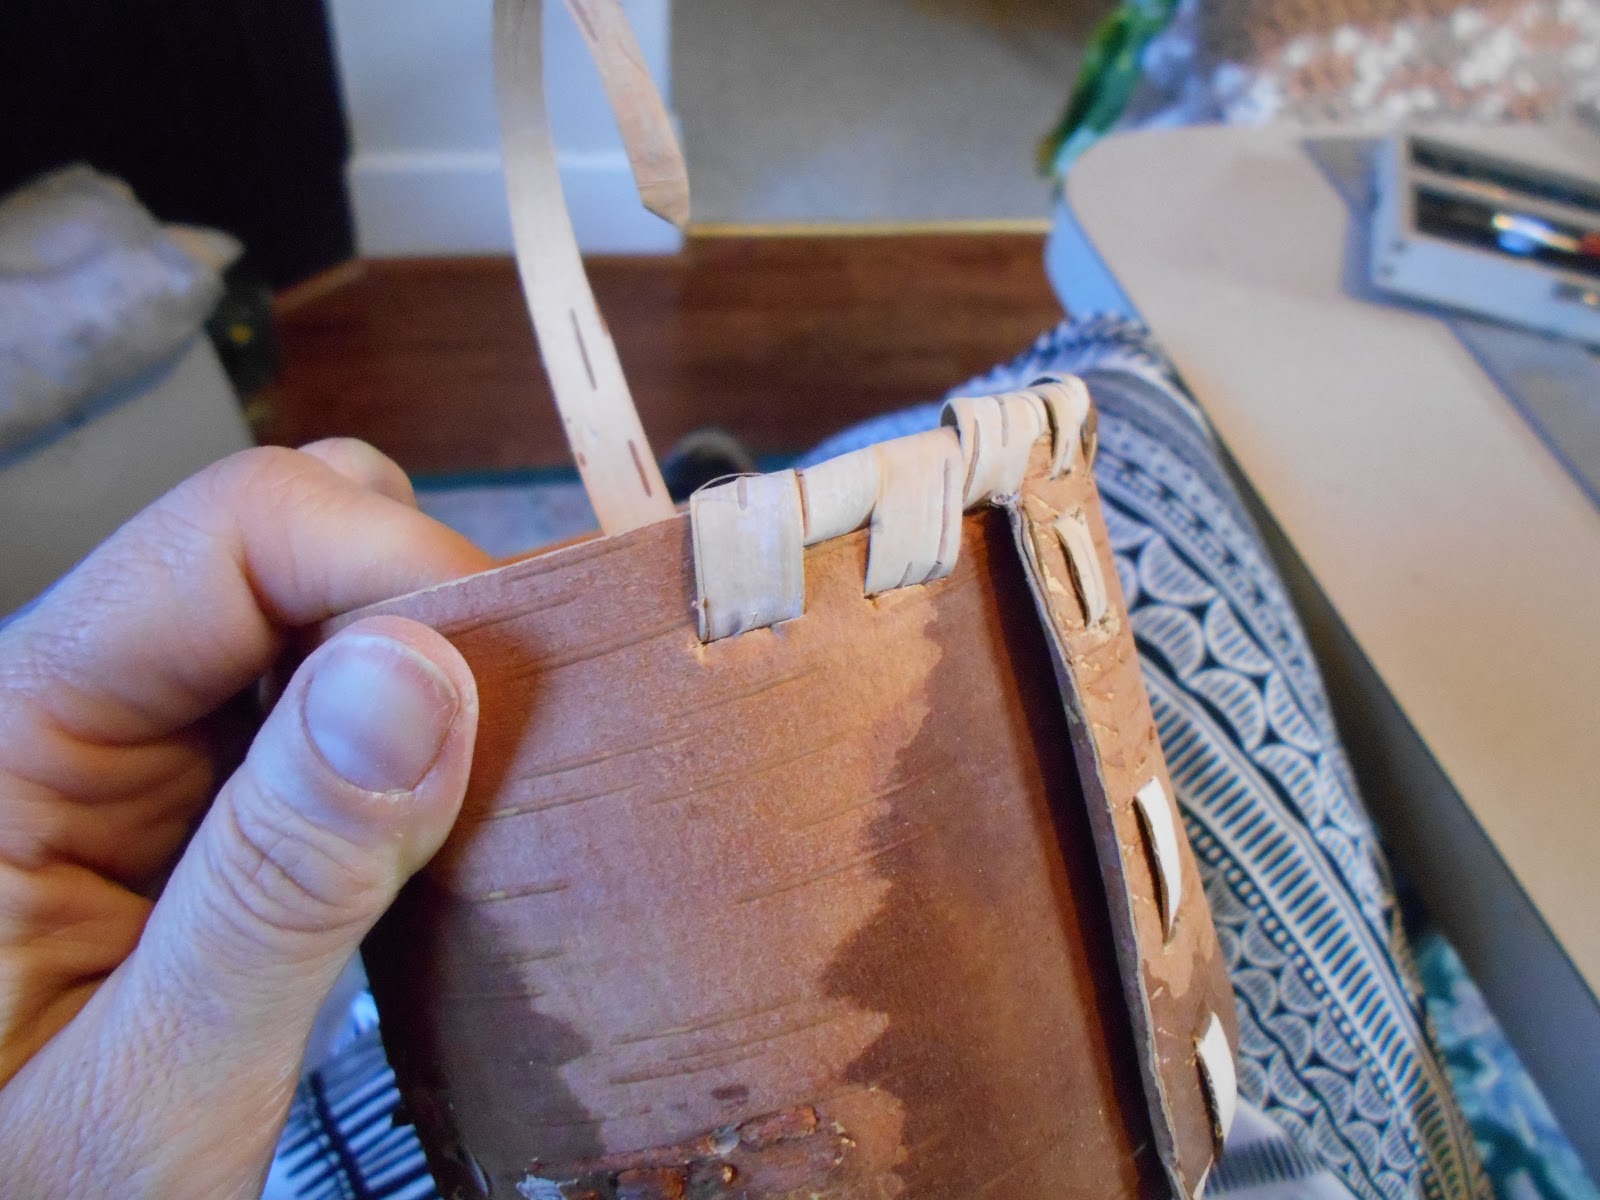
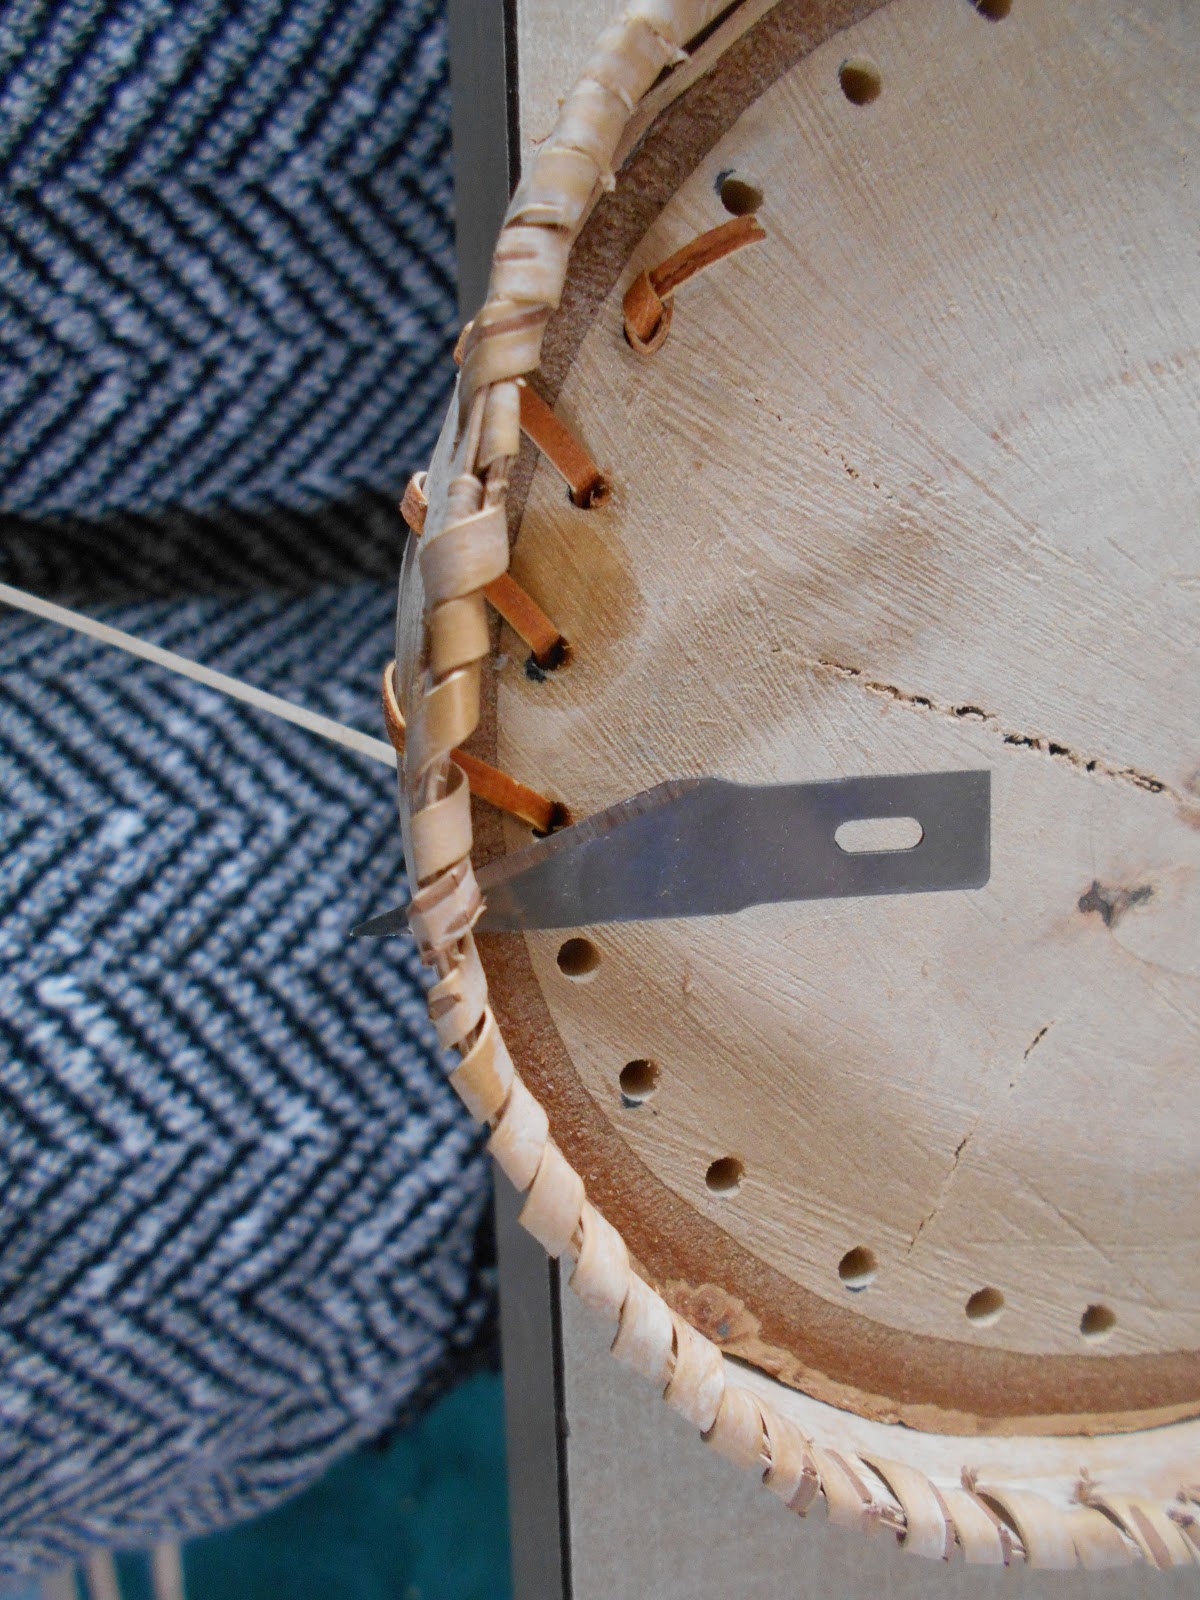
After processing the bark I started experimenting with creating sturdy sides. I referenced modern birch bark box crafting which uses two layers of bark placed back to back and the sides are then stitched together around the edge to create a lip. Using a pocket knife, a straight edge and a small exacto blade as my only tools for this project, I created two small side pieces for the lid and two larger side pieces for the main body of the box. I used strips of birch bark as my “thread” and it was very sturdy and when cut to a point it easily made a built in “needle” which I found could explain why the original thought by the extant archaeologists was that the piece was a fabric or leather sided box instead of a birch bark sided box.
While there is no information of the height of the extant birch boxes, based on the strength of the material it is my belief that they could have been quiet deep to accommodate all the material and jewelry that was later found in them. My half scale birch box is very sturdy and would easily be able to hold heavier items. I looking forward to attempting a larger container when I am able to find an birch tree to accommodate the size. Below are photos of my process.
DSCN1430.JPG
DSCN1432.JPG DSCN1435.JPG
DSCN1440.JPGDSCN2155.JPG


DSCN1449.JPGDSCN1453.JPG
DSCN2154.JPG DSCN2158.JPG
birch box doc.jpg


Bibliography:

Zubkova, Elena S. et al. 
            “Studies of the Textiles from the 2006 Excavation in Pskov” NESAT X Pg 291-298

Avdusin, DA & Puskina,TA
             “Three chamber graves at Gniozdovo” Fornvännen 83 1988 pg. 20-33


Iivius.
"The History Blog." The History Blog. N.p., 9 Nov. 2015. Web. 26 May 2017. <http://www.thehistoryblog.com/archives/39295>.


Savelyev, and Belyaev.
"News From the Latest Discoveries of Archaeologists IA RAS."Http://archaeolog.ru. N.p., 26 Oct. 2015. Web. 26 May 2017.


Artsikhovsky, et all.

"Old Russian Birch Bark." Древнерусские берестяные грамоты. Russian State Museum, n.d. Web. 26 May 2017. <http://gramoty.ru/>.


PLEASE NOTE. All photos and the contents of this webpage belong to myself Rannvaeig Eskilkona and are not to be reproduced or used without my expressed permission. All rights reserved and copyrighted.

Monday, January 16, 2017

Time flies when your ..... (insert excuse here)

Happy 2017 everyone!
I hope this post finds you well.
Here was my A&S entry from October 2016
Promise more is coming soon friends!


Tuesday, May 17, 2016

Whip it! Whip it good!

As I am sure you are starting to notice...I like catchy titles! So what does this whip business mean?


In this post I would like to start with a very simple but extremely effective demonstration of the whip stitch. The whip stitch is a simple stitch that can be used to add a huge amount of detail and visual interest to our garb/ clothing. I have a dress that I made that I receive a huge amount of attention over and the key component of why it looks so good/so authentic is due to the simple whip stitch.

Lets begin with how this applies to my 10th Century Varangian persona and her clothing. I study the clothing of female graves found in modern day Eastern Sweden, Western Russia and Ukraine that are identified as Scandinavian in nature by tortoise shell brooches and that date roughly to the 9-11th century. ( If you are very very new to Norse/ Scandinavian clothing and this last bit confuses you worry not there will be more information on this in posts to come in the future....for now run with me on this). One of the grave complexes that I have been studying in earnest is the grave complexes of Pskov, Russia. 

This particular post will not be discussing the amazing dress found at Pskov and the various interpretations of it's cut and usage (I promise to come back and add a link here when I cover this...and oh am I going to cover this topic) what we are going to be looking at is the wonderful stitch that was found on the seams and trim of the clothing that are left for us. In a grave there was found the remains of a birch box that had within it at least 2 articles of clothing. The most common interpretation of these two pieces is that it is an under dress and an over dress, and wrapped up withing the folds of these two dresses was a pair of Scandinavian tortoise shell brooches. The under dress neckline was preserved almost completely intact and on that neckline we had the following stitches.

Whip Stitch
Running Stitch
Chain Stitch
All three of these stitches are great, simple stitches that add a huge amount of visual interest to our clothing and can be used both as construction stitches and as I have used them as a combination of construction and "visual interest" or decorative stitches.


The project that I am working on currently is my interpretation of the Birka 735 Banded Dress/ Coat. I have merely used the Birka 735 grave as inspiration for my Birka Coat (I am sure that there is evidence of whip stitches in Birka but at date I don't have that data so I have used Pskov as my reference point). I did not follow the banding or the cut exactly but simply had a huge amount of trim that I had picked up years and years ago from Calontir Trim and I wanted to use it up. The trim that I used is a simple weave...probably polyester and in no way shape or form period. I am a very big advocate for using up what you have first so thus I am practicing my hand sewing skills while being resourceful and showing you how to make really period looking garb out of the items you have on hand.


To begin with lets learn the whip stitch.
The whip stitch is a very easy stitch that once you get the hang of it can go very easily and very quickly. The best way to visualize a whip stitch is to think of a zig zag that is actually "wrapping" the edge of a seam or seams. For me it is always worked from right to left ( I am right handed). What does that mean you might wonder, that means that as I do my stitching I am starting at the far right of my area to be stitched (in this case the far right of my piece of trim) and I am stitching over and over again working my way to the left.


The trick for me to a really successful whip stitch is two things. Spacing and and consistency. Remembering to bring the needle and thread up at the bottom of the zig zag rather than at the corner always makes the job 10X easier. 

Bring your first stitch up from under the trim/ seam
and always start in the bottom corner of the "zig zag"


Once you get the hang of the stitches just keep going and stitch stitch stitch. I used a whip stitch to attach and thus hide the machine stitching that I used on the trim of this coat. I measured out and marked the straight lines of my coat, pieced the trim onto their respective straight lines and machine stitched the trim pieces in place. I then whip stitched undyed linen thread over all the seams and have thus far created this.


I have used this whip stitch on other pieces and I can't tell you how much this small but mighty stitch has added to my clothing. In the future I maybe removing the machine sewing element and just hand sew the clothing from start to finish but until that day I will probably use this as well as other stitches that I hope to share with all of you as I work on them. I think we can all add small flourishes like hand stitching to really step up our garb.

And like any good SCAdian I have take a photo of the stitching from the inside so you can see that as well. I am working on not having knots in my work ( a kind embroidery laurel informed me that knots are so not period :) 

I hope you have enjoyed this quick little tutorial. If you have any questions feel free to comment below or send me a message. I hope you have a great time adding some visual and period stitches to your clothing. Next week I am hoping to do a tutorial on the Pskov under dress I mentioned above. Until then!

In service to my dream and yours:
Rannvaeig


Friday, May 13, 2016

Not letting perfect stand in the way of good!

Welcome to the first blog post!

I was tasked by my laurel ( teacher and mentor in my re-enactment group) to start a blog for my sewing and research projects. I was reluctant to do this thinking that there are a million blogs out there and mine will be just one of the multi million that are floating around in cyber space, always half finished and not really very reliable. To be fair it is completely plausible that this blog will always be half finished because I will never know everything thing about the topics that interest me but.....but I do have some useful information and I love to take photos and this seems to be a good combination for a blog. So here we go...

WHAT YOUR GOING TO FIND HERE:

Here is what you can expect.

#1 Research-
  • I am a research junkie and thus I really enjoy sharing what I find with others. I do not abide by this idea that information should be hoarded away while others are desperatly trying to stumble along the path behind you. I will be posting my research, some of it my be very theoretical and subjective but it will be available for you to read and decide for your self what your thoughts are on the same data that I am using.
#2 Creativity-
  • I am a very proud member of the Society for Creative Anachronism. I believe that it is important to be able to use your creativity to understand what it is that we are researching. Now the caveat to that statement is that I do not believe that we should use the excuse of "creativity" for sloppy/ lazy research or recreation attempts.
#3 Failure-
  • I think this point is the most important one. I am really bad about allowing the desire to be "perfect" keep me from even getting to the point of being "good" Let us not do this! I will be showing you all my attempts, theories, trials,errors,successes and failures in recreating the items that I am researching. I will be working threw my experiments and showing you the process along the way. This part of my blog is to help me to remember that no one became a master over night.

WHAT YOU ARE NOT GOING TO FIND HERE:

Politics( SCA OR MUNDANE)
Shaming
Plagiarism


If these are things that you are interested in and you have the mind to read through my rambling sentences then please follow along.

In service to my dream and yours!
All my best:
Rannvaeig